In the age of streaming, building your own home media server might seem like a niche project. But in reality, it’s a powerful way to take control of your entertainment.
Whether you want to store high-resolution movies, music, family photos, or TV shows, a home media server gives you instant access to all your digital content—on any device, at any time, without monthly fees.
Creating a home media server is easier than you might think. With modern software and affordable hardware, even beginners can set up a robust system. Here’s how to do it step by step.
1. What Is a Home Media Server?
A home media server is a dedicated device (like a PC, NAS, or Raspberry Pi) that stores and streams media content to other devices on your home network. Think of it as your own personal Netflix or Spotify—but completely under your control.
With a home server, you can:
-
Stream movies and shows to smart TVs, phones, and tablets
-
Access music libraries from anywhere
-
Share files across multiple devices
-
Create backup storage for photos and videos
2. Choose Your Server Hardware
You don’t need a supercomputer to run a media server. Depending on your needs, here are your main options:
A. Use an Old Computer
-
Ideal for beginners
-
Just make sure it has at least 4GB RAM and sufficient storage
-
Install a clean OS and dedicated media software
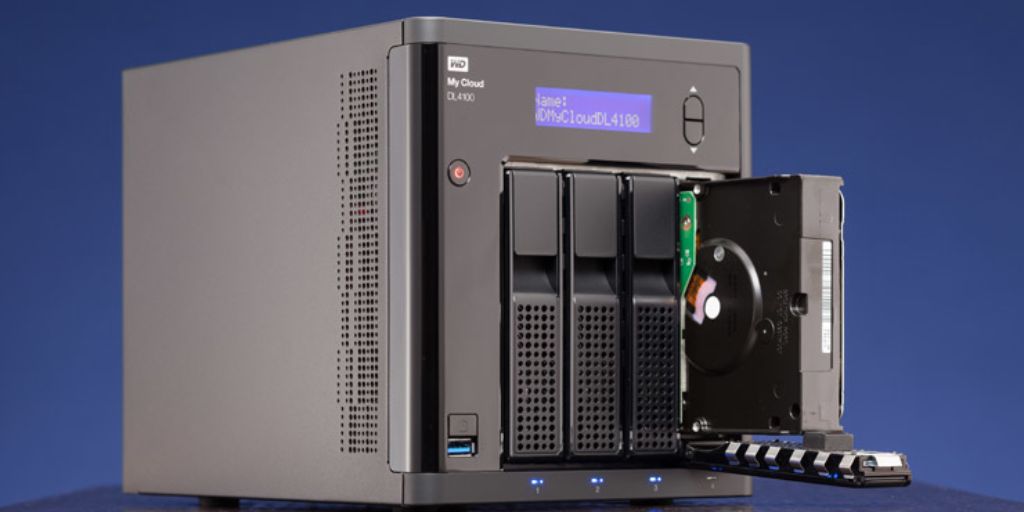
B. Buy a Network Attached Storage (NAS) Device
-
Designed specifically for data storage and sharing
-
Popular models: Synology, QNAP, Western Digital My Cloud
-
Some NAS units come with media server apps preinstalled
C. Build a Small Form Factor PC
-
More power and customization
-
Great for 4K streaming or multiple users
D. Raspberry Pi (for Light Use)
-
Low-cost, low-power solution
-
Suitable for music libraries or small media collections
3. Decide on Operating System and Software
Once you’ve selected the hardware, the next step is to choose an OS and server software.
Recommended Operating Systems:
-
Windows or macOS: Good for general users with basic needs
-
Linux (Ubuntu, Debian): Efficient and highly customizable
-
FreeNAS/TrueNAS: Tailored for NAS devices
Popular Media Server Software:
A. Plex
-
Most popular option
-
Beautiful UI and auto-organizes content
-
Apps available for smart TVs, phones, and consoles
-
Supports remote streaming and transcoding
-
Free tier is powerful; optional paid Plex Pass for premium features
B. Jellyfin
-
100% free and open-source
-
Good Plex alternative for privacy-focused users
-
Supports live TV, plugins, and local streaming
C. Emby
-
Freemium model like Plex
-
Easy setup, strong parental controls
-
Good hybrid between Plex and Jellyfin
D. Kodi
-
Originally designed for home theater PCs (HTPCs)
-
Great for local playback and rich customization
-
Requires manual library management and setup
4. Organize Your Media Library
A key step that saves headaches later: properly name and organize your files.
-
Use folders like:
-
/Movies/ -
/TV Shows/ -
/Music/ -
/Photos/
-
-
For movies, format file names like:
MovieName (Year).mp4
Example:The Matrix (1999).mp4 -
For TV shows:
ShowName/Season 01/ShowName - S01E01.mp4
This helps your server software fetch metadata (like posters and plot summaries) automatically.
5. Install and Configure Your Media Server Software
Setting Up Plex (Example):
-
Download Plex Media Server from plex.tv and install it on your chosen machine.
-
Launch Plex and create an account.
-
Add media libraries by pointing Plex to the folders where your content lives.
-
Let Plex scan and index your files—it will download metadata automatically.
-
Install the Plex app on your phone, smart TV, or tablet to start watching.
Network Access:
-
Most media servers are accessible via a web browser at a local IP address (e.g.,
http://192.168.1.100:32400)
-
You can access your content from any device connected to the same network
6. Stream Media Across Your Devices
With your server up and running, you can now stream content to:
-
Smart TVs (via native apps or casting)
-
Streaming devices like Roku, Apple TV, Fire Stick
-
Mobile devices using apps (Plex, VLC, Jellyfin, etc.)
-
Game consoles like PlayStation and Xbox
-
Computers and laptops through browsers
If your software supports transcoding, it can adjust the video format and resolution in real time, so even older devices can play high-res content.
 How to Create a Home Media Server
7. Add Remote Access (Optional but Powerful)
Want to access your server when you’re outside your home network?
Options:
-
Plex Remote Access: Built-in and easy to enable
-
Jellyfin Remote Access: Requires port forwarding or a reverse proxy
-
Use Dynamic DNS (DDNS) to map your IP to a domain name (e.g.,
myhomeserver.dyndns.org) -
Set up a VPN for secure and private remote access
Always use strong passwords, and consider enabling HTTPS encryption for secure connections.
8. Tips for Better Performance
-
Use Ethernet over WiFi: Wired connections are more stable, especially for 4K streaming
-
Enable hardware acceleration if your CPU or GPU supports it
-
Regularly back up your media library
-
Keep server software and operating system updated
-
Monitor server performance using tools built into Plex, Jellyfin, or your NAS dashboard
9. Bonus: Add Extra Features
Enhance your media server experience with these additions:
-
Tautulli: Analytics and usage stats for Plex
-
Sub-Zero or OpenSubtitles: Automatically download subtitles
-
Sonarr/Radarr: Automate downloading of TV shows and movies (use responsibly)
-
Nextcloud: Add file sharing and document access
-
DLNA Support: For older devices without native apps
Conclusion
Setting up a home media server is one of the most rewarding tech projects you can take on. It gives you full control over your digital library, eliminates the need for cloud subscriptions, and turns your household into a connected entertainment hub.
Whether you’re a casual user who wants to stream home movies or a media enthusiast looking to build a full-blown digital archive, creating a home media server is more accessible than ever in 2025. With the right tools and a little setup time, you’ll be streaming on your own terms in no time.